How to use Total Media Converter for Mac
Useful Article
Part 1: How to convert Blu-ray, DVD, video and audio
Part 3: How to burn home Blu-ray & DVD
Part 4: How to copy Blu-ray & DVD disc
Part 1. How to convert Blu-ray, DVD, video and audio
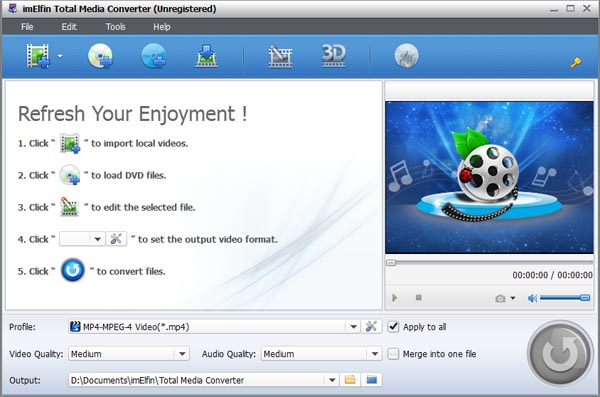
Step 1: Run Total Meida Converter for mac
Once it was installed successfully, launch the program. And the powerful 8-in-1 features almost display in the main interface.
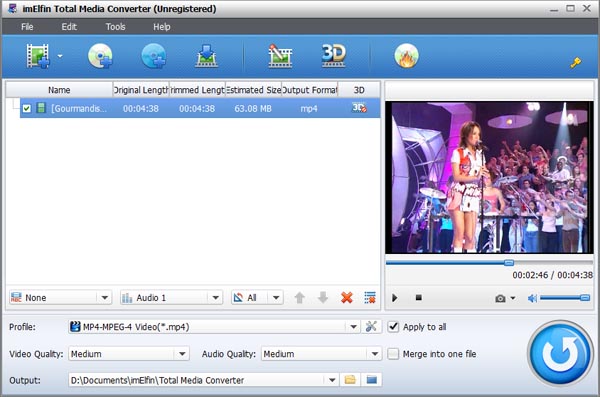
Step 2: Load source files
Drag the media files to the program or Click "Add Video" or "Add Blu-ray/DVD" button to load videos, audio files, Blu-ray & DVD folders from mac or other devices like USB device, camcorder, Quicktime player, etc. It supports batch importing multiple files and media conversion.
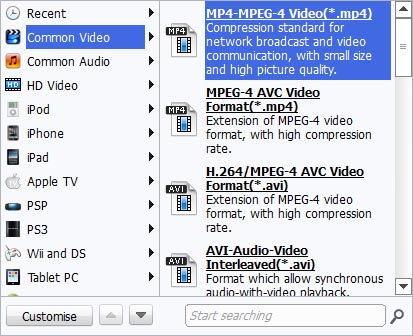
Step 3: Set output format
Select the drop-down format list next to the "Add Blu-ray/DVD" button and choose "Change" option. Then it will open the profile panel and select a format as you prefer. If you have no idea to choose which format, switch to "Device" option, choose a device as you want to play the output video.
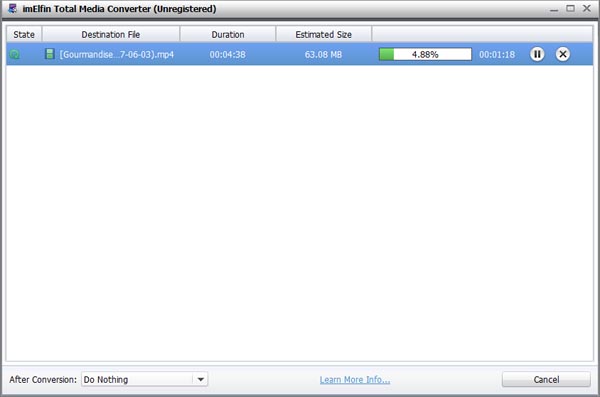
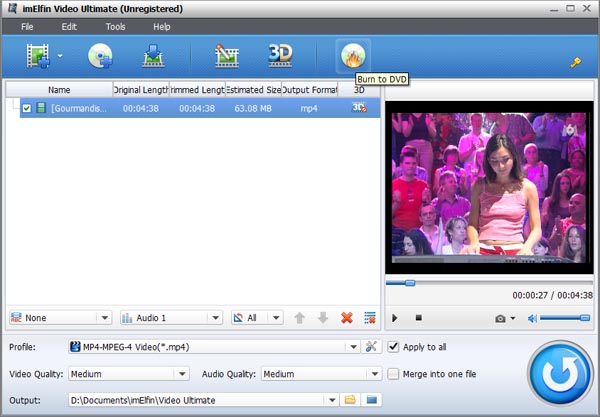
Step 4: Start video converting
After finishing setting the output format, you can move down or up to set the converting order at will. Once all settings are ready, click the big green "Convert" button on the sub-menu bar and choose where you want to save in the expanded setting panel. Finally, press the bottom "Convert" button to start converting.
Part 2. How to edit video
Step 1: Convert 2D to 3D
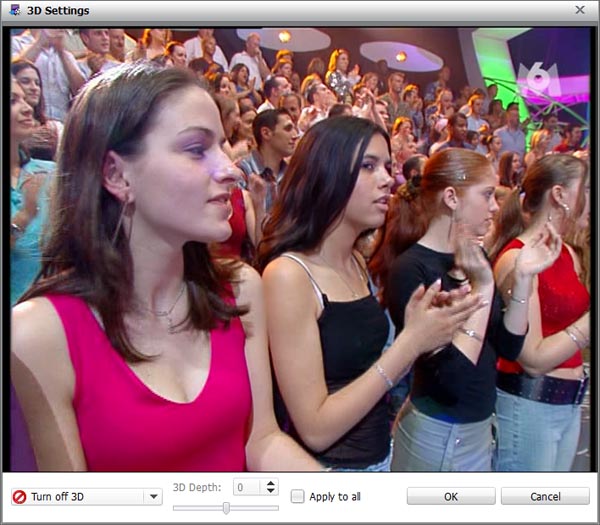
After adding source media files, we can click "Edit" icon in each title. Then it will call out the built-in video editing panel. Switch to open the "3D" sub-tab and turn on 3D mode. Now Total media converter offers 6 types of 3D effects like Red/Cyan, Red/Green, Red/Blue, Blue/Yellow, Interleaved, Side by Side. You are also allowed to adjust the 3D Depth from -50 to 50. Once all settings are ok, press "OK" button to save all settings.
Step 2: Edit your videos
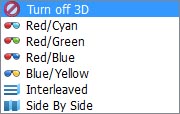
There are the other sub-tabs including Trim, Watermark, Crop, Effect in the open editing panel. The Trim sub-tab is designed to remove unwanted clips by setting start time and end time. Or dragging the twins limiters on the play bar. The Watermark allows you to add image or text to video by setting text font, color, transparency, position, etc. The Crop guides you to choose a way of Zoom option and set the left and top values to crop unwanted margins. Of course, you can also drag the dot frame box on the left Original Preview window to finish cropping. The Effect enables you to set Brightness, Contrast, Saturation and Valuezoom.
Part 3. How to burn home Blu-ray & DVD
Step 1: Load videos & ISO
Switch to "Burn" tab and select "Add Video Folder" or "Add ISO file" to load source videos or ISO files. Once the loading processing is finished, you can set the output disc type (DVD-5, DVD-9, BD-5 or BD-50), aspect ratio, quality in the bottom of the total media converter.
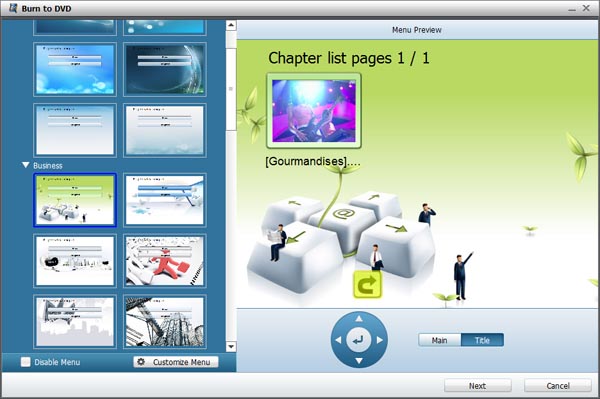
Step 2: Select menu template
Select a menu template as you prefer in the right side bar and apply it into the output Blu-ray or DVD. There are 8 types of menu templates like Childhood, Education, Holiday, Wedding, Business, Standard, Sports for your choice. Choose one template and click the middle eye icon on the sub-menu bar to preview. By the way, the pencil icon next to the eye icon allows you to add music or image or video as background and customize text settings. Of course, you can redesign main menu and chapters or click "Get More" button in the right side bar to download more free templates from imElfin official websites.
Click the big green "Burn" button to open the the output panel. Set burning options like: Burn to (make sure you insert a writable blank disc into the disc drive), Disc Label, Save to.

By the way, if you load ISO files, it will pop up an "Add iso file" window after finishing ISO file. Set the "Copy to" and "Disc label" options.

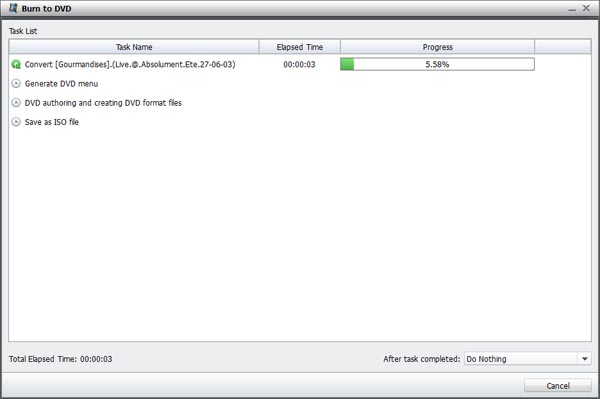
Step 3: Start to burn
Finally, click the "Burn" button to begin burning videos to Blu-ray/DVD or burning ISO file to a writable blank disc which you have inserted into disc drive.
Part 4. How to copy Blu-ray & DVD disc
Step 1: Add Blu-ray & DVD disc
Switch to Copy tab and load Blu-ray & DVD disc (folder) for backup. Choose a copy mode from Full Movie, Main Movie and Custom Mode and set the output disc type at bottom. You can instantly preview the loaded Blu-ray/DVD movies with the built-in media player.

Step 2: Do backup settings
After clicking "Convert" button, the right pop-up side bar allows you to back up disc to disc. and set the disc drive as output to save. Make sure you have loaded a blank and writable disc into disc drive.

Step 3: Start copying Blu-ray/DVD
Now just press the "Copy" button on the bottom right sidebar to start cloning Blu-ray/DVD.